
So my oldest son, Josh, called me from Hawaii where his ship is docked, and after I hung up my husband asked, “How is the boy going to inconvenience us this time?”
Good question.
It is going to happen. After all, he was born during the worst snowstorm of that year.
This time, even though we are out of a job (got laid off two weeks ago) and in the middle of a move, my son is bringing a young lady home, someone we have never met. On top of that, she is coming to my house a day before he is scheduled to arrive on the very day my husband is scheduled to have knee surgery at a hospital an hour away. The upshot is this: A strange young woman is coming to my house when I will not be there, let herself in, be there when I get home, and then as I take care of my invalid, post-surgery husband, I will entertain her.
Is that all he wants?
Once when he came home from college, a six-hour road trip, he brought his roommate’s snake with him. It escaped. The snake and I drove that car around for a week before Josh finally found it.
Then there was the time when Josh hitchhiked and hopped trains all the way from our little town in Western Pennsylvania across the country, down to the tip of Mexico, and back again. He called me from Pittsburgh, an hour away from our town, and said he needed a ride home, could we come and get him? I don’t know why after traveling all those miles he couldn’t find his own way home, but off we went and what is the first thing that kid said to me when he saw me? “Mom,” he said, all innocence, “Your hair got gray.” Dear Reader, I will leave you to imagine what happened next. It was not pretty.
Josh is not the only troublemaker in our family, however. Every time I get off the phone with Gabriel, my youngest son, his dad asks me, “How much is this going to cost us?”
Another good question.
Gabriel is in China studying Chinese culture and Mandarin. He is full of good ideas, the latest is how he is going to spend the summer in Manchuria studying Chinese nomadic tribes. Great, I said. You can do anything you can pay for. That was the last I heard of that.
His dad and I finally had to say no to something.
We have already paid for two trips to Germany (to study the language, he said), and later that summer, the one to Beijing. And then there were those semesters at University, and the piano and the cello when he was a music major, and I won’t even talk about all the strangers he dragged home and we fed, and the traffic tickets we paid. Wait. I don’t want to think about it anymore.
I know what you are thinking: Just say no.
Oh, but that it were that easy, because really, these apples did not fall very far from the tree.
Every time I want to say no, something deep within stops me. Conscience (or God) reminds me of almost all the conversations I have had with my mother since I became an adult. They all begin like this: “Mom, I’m going to ask a favor of you and you can say no if you want to. . .”


Karen Baier’s Best Ever Hot Chocolate
Beauty is only a light switch away. That’s what my friend Karen says; she has a fabulously funny way with words.
Karen is the lustiest person I know. It is not just about sex; she embraces life and dances with it. She does everything to the maximum. She says her life has two speeds: flat out and stop. After a few years of observation, I would say she is telling the truth.
A dyed-in-the-wool liberal, Karen loves politics and can discuss at length who is running for anything and why the Democrats should always be in the White House. She loves men and is really not very picky about them. He just has to be willing to sample from Karen’s smorgasbord of life, which includes opera, ballet, country music, square dancing, movies, theater, and all things fun. The only tie her man needs to own, she says, is a black tie.
Best of all, Karen is a passionate friend and my life and those around me are so much richer because of her.
Here is her entry into the recipe book.
Eagle Safe Ingredients
1 sheet matte gold cardstock, cut into these sizes: 6- by 6-inches, 4- by 5½-inches, 3¾- by 5¼-inches, 1- by 4-inches (to be cut later because you have to print on it), and 1- by 3-inches, lettering (lowercase is ½-inch high)
1 sheet black cardstock, cut into these sizes: 4½- by 6-inches, 1¼– by 5⅛-inches, 1¼- by 4⅜-inches, and 3¾- by 5¼-inches
1 sheet cream cardstock
Cowboy boot punch
Jolee’s eagle embellishment (http://jolees.eksuccessbrands.com/dept/Americana+and+Patriotic.aspx)
Steering wheel punch
Pop dots
Single-sided tape for hinges
Brown ink
Lettering, lowercase is ½-inch
1. Before you cut anything out, print the recipe and side card first. Since this was for my friend Karen, I used her name on the small gold card on the side. It says: On Dec. 25, 2004, Karen Baier discovered the secret to a man's heart. You will want to replace that with your own sentiment. I used Times New Roman font, size 12 to print on the gold and Bradley Hand ITC, size 13, on the cream cardstock for the recipe.
2. Place the black piece size 1¼- by 4⅜-inches on your work surface right side up. Butt against it on the long side the black piece size 1¼– by 5⅛-inches right side down. Line them up so the shorter piece is centered on the longer piece. Use a 1-inch long piece of tape to “hinge” them together. They should be like long, skinny pages.
3. Secure the gold piece 1- by 3-inches to smaller black piece.
4. Repeat the process with the gold pieces sizes 4- by 5½-inches and 3¾- by 5¼-inches
5. Secure the black piece size 4½- by 6-inches to the right-hand side of the 6- by 6-inches square gold piece.
6. Secure the small black pieces to the left-hand side of the square gold piece.
7. Tear the recipe out of the cream cardstock, then ink the edges. It’s supposed to look like old parchment. Secure to the matte gold cardstock.
8. Secure the boot cutout to the small gold piece of paper. Secure that to the outside of the black piece of cardstock.
9. You can see how the card is laid out. I used a pop dot to secure the steering wheel.
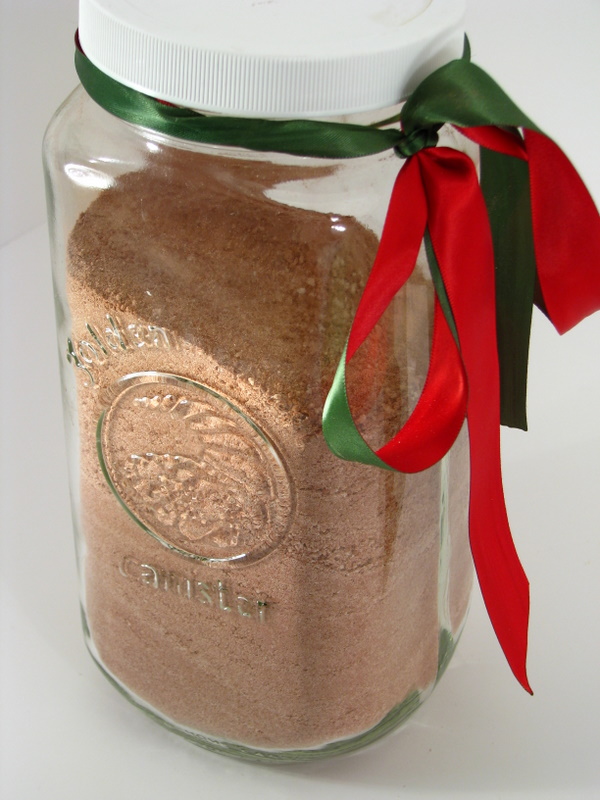
Karen Baier’s Best Ever Hot Chocolate
16 ounces Nestle’s Quik chocolate powder drink mix
3 ounces Coffeemate non-dairy powdered creamer
16 ounces confectioner’s (powdered) sugar
8-quart box of carnation non-fat dry milk powder
Mix together. Store at room temperature in a dry container.
To make a cup of hot chocolate, put ⅓-cup of mix into a mug and fill with hot water. Top with whipped cream if you like.
Karen’s note: Have a second cup. It won’t make you sick like hot cocoa or other hot chocolate mixes will.


